Showing posts with label recipe. Show all posts

Apr 13, 2016

Healthy Chicken Fried Rice

I've been cooking a lot more lately, and since I get home so late, I want the things to be quick, easy, delicious, and healthy. And this dish is super easy, so yummy, and quicker than calling for delivery. This fried rice has protein and tons of veggies to keep you full and no MSG or other icky stuff in it.

I keep this super easy by using a veggie mix. I love this one (Eat Smart Vegetable Stir Fry) that I find in the produce section. It has tons of my favorite veggies, broccoli, snow peas, shredded carrots and broccoli slaw. The broccoli slaw kinda has the look of bean sprouts in the finished dish, which is great, cause I never seem to finish a package of bean sprouts when I buy them. You can also use any fresh or frozen veggie mix that you like. All the veggies really make this filling without being so heavy on the rice. Plus you get in more veggies, and that's always a good thing!

This is also a great recipe to use up leftovers. I almost always use leftover rice for this recipe. It makes it all come together so quickly And feel free to mix it up and use any protein you have on hand, beef, pork, ham or even tofu. You can also use leftover veggies.


Healthy Chicken Fried Rice
Serves 4

Ingredients:
1 pound boneless skinless chicken breasts or tenders
1 package stir fry veggies (fresh or frozen)
2 cups cooked rice (white or brown)
2 eggs
Green onions (optional), greens and whites, cut on the diagonal
1 tsp. garlic powder
1-2 tablespoons soy sauce or liquid aminos
Olive Oil

1. Slice the chicken breasts into bite size pieces.
2. Heat a drizzle of oil in a large saute pan over medium high heat.
3. When the oil is hot, throw the chicken in the pan and season with garlic powder (I don't measure, but I think it's about 1 tsp.).
4. Cook the chicken, stirring occasionally until fully cooked and no longer pink.
5. While the chicken cooks, whisk the two eggs.
6. In a small frying pan, heat 1/2 tsp of oil, and cook the eggs into an omelette (or scrambled eggs, if you can't make an omelette). When done, remove from pan and set aside.
7. Once the chicken is cooked, add the veggies and about 1/2-3/4 cup of water to the pan.
8. Stir the chicken and veggies around scraping up any brown bits from the bottom of the pan.
9. Let the veggies steam in the water to cook uncovered. Let the water evaporate.
10. Once the veggies are done and the water is almost all gone, add the rice and stir into the chicken and veggies.
11. Chop up the egg into small bite size pieces and toss into the pan as well.
12. Add the soy sauce and stir everything together.
NOTE: Here's the part where it's by taste. You wanna add enough soy sauce to make the rice that brown "fried rice" color, but not so much that's its too watery. Start with 1 tablespoon and then see if you think you need more. Taste it to make sure you like the flavor. If you add too much soy sauce and it's watery, just cook and stir a little longer to let the liquid evaporate.
13. Garnish with green onions (I like a lot!) and serve!

This is also totally 21 day fix approved! Each serving is equal to 1 red, 1 green, and 1 yellow.

My guinea pig for my recipes, as always, is Grandma, and she loved this so much, she went back for more.

Have you ever made a take out recipe at home?

Sep 8, 2014

Baked plantains

Plantains seem to be the hot new food trend in the healthy circles these days, but for me it's been a staple of my diet since before I can even remember. Plantains were almost a daily staple on my dinner table. Since plantains are so available now, I figure I'd share some of the ways to cook plantains with you.

Plantains may look like bananas on steroids, but they aren't just big bananas. They are starchier and you have to cook them. You can cook them when they are green and unripe or yellow and ripe. (TIP: The more black spots on your ripe plantains, the sweeter they will be.)

Though the usual recipes call for you to fry the plantains, I was looking for something healthier, baked plantains. You can easily make this in the oven, but it's so easy to make in the microwave. This works with ripe plantains. These were a little under ripe for my taste (I like them sweeter), but still worked really well.


Ingredients
~ 1 ripe plantain
~ Oil or cooking spray
Yields 2 servings

1. Peel the ripe plantain. (Use a knife to cut off the ends and score the skin, then peel with your fingers.)
2. Coat lightly with oil or cooking spray and wrap in paper towel.
3. Microwave for 2 minutes (or until soft). (Alternately, you can bake the plantains until tender and caramelized.)
4. Eat as part of your favorite meal.

The plantains are sweet on their own and there is no need to add any sweeteners. This recipe is so easy and so yummy. It makes a perfect side dish for any meal. I really love having sweet plantains with pork or chicken.

Have you tried plantains before?

May 15, 2014

Oreo cupcakes

I love getting cupcake requests, cause it forces me to come up with new flavors of cupcakes. My friend, JP, asked for Oreo cupcakes for his birthday, and I was more than happy to oblige.


These cupcakes start with an Oreo on the bottom. Can you imagine anything yummier? Separate the Oreo and put the half with the cream on the bottom of your cupcake liners. Save the tops of your Oreos to add to your buttercream later.


I then filled my cupcake liners with the batter. I added crushed Oreo pieces to the batter. Next time I'm gonna mix them in, so you can get little Oreo pieces throughout the cupcakes.


They baked up so nice.


Now, it's time to make the buttercream. I started by making a basic vanilla buttercream. Then I took the Oreo tops that I saved from before and crushed them in my mini food processor. Make sure the Oreo crumbs are fine, so they won't be clumpy when you add them to the buttercream. (I took my Mom's suggestion and passed the crumbs through a strainer before adding them to the buttercream.) Then just add your Oreo crumbs to the buttercream and mix them in.


Then frost your Oreo cupcakes with your cookies and cream frosting and sprinkle some extra Oreo crumbs on the top.


These cupcakes were great, chocolatey and full of Oreo goodness from the frosting all the way to the cookie at the bottom. These are perfect for a choco-holic or Oreo addict!

Jan 2, 2014

Pasteles workshop

Last weekend was time for a pasteles-making workshop. We had a pasteles making class (you can get the detailed instructions there) a while back, but a couple of the cousins wanted a refresher course in making them. A small group of us gathered, to share the tips on how to make the yummy holiday dish and the primas that don't know how to make them got a refresher.

Mom got all fancy and wore her chef hat to the festivities.

Patiti had made the meat the night before, so all that was left was making the masa. Luckily, the bananas and malanga were already peeled, so we just needed to process them. Gisela was able to use the ne food processor that Santa brought her to grate up the bananas, while Alina handled the malanga with our food processor.


It was like Iron Chef in Matiti's kitchen, and Yoly "interviewed" the cooks. LOL! Mom and Yoly were the pasteles masters directing how to make them. We made the masa, and added the achiote oil to the mixture to give it some color.

Then it was assembly time. We pulled out the aluminum foil and started putting the masa and the meat into them. Alina finally got a hand in making the pasteles. After a few, I think she got the hang of it.

Grandma and Matiti supervised the whole thing (and ate some of the test pasteles, of course).

Then it got factory-style in the kitchen putting the pasteles together.

Finally, a shot of the photographer!
 
Of course, there had to be a taste test when they were all done. 

And after all those pasteles being made, everyone got some to take home. I think there were about 60 made!

Doing these classes is so much fun. I love getting together and seeing those recipes done once more.

Do you have any special family recipes that others are dying to try?

Jul 3, 2013

Strawberry Lemonade cupcakes

Another birthday celebration means another batch of cupcakes. This time it was for my friend Karina. I knew I wanted something fruity, fresh and summery for her. Every time I make cupcakes she claims that whatever I make is her new fave. Karina had been been raving about the lemon cupcakes I brought in not too long ago, but had to give them a new twist for her birthday. Nothing is more summer than lemonade and strawberries, so I combined the two to make strawberry lemonade cupcakes.

This is another doctored up cake mix creation. I took some lemon cake mix and added fresh lemon zest to the batter. Before baking, I dropped some strawberry preserves in the center of each cupcakes. Once you take a bite you'll get a little bite of strawberry. I dropped in the preserves after filling the cupcake liners and the cake baked right over the preserves. Plus it's way easier the pouring in batter, then preserves, then batter.

For the frosting I made a basic cream cheese frosting. Just cream cheese, butter, vanilla and powdered sugar.

Then I added some lemon zest.

After the frosting was ready to go, I folded in about a half a cup of preserves.

 I love the swirl of berries in the frosting. (You can see the full recipe below).

I decorated the cupcakes with fresh strawberries and paper straws to play up the "lemonade" part. And I even used my teacup cupcake molds for the first time. They are so cute.

Strawberry Swirl Cream Cheese frosting

2 sticks of butter (room temperature)
1 8oz. package of cream cheese (room temperature)
1 pound of powdered sugar
1 tsp. lemon zest
1 tsp. vanilla
Pinch of salt
1-4 tbls. heavy cream
1/2 cup of strawberry preserves

1. Cream the butter and cream cheese. (You can use a stand mixer or a handheld one.)
2. Add the powdered sugar and mix slowly at first, so you don't get powdered sugar everywhere. Then increase the speed and mix until it is all mixed in well and looks fluffy.
3. With the mixer still going add the vanilla and salt.
4. Keep mixing and add the cream a tablespoon at a time until the frosting is your desired consistency.
5. Add the strawberry preserves and fold in by hand.

Yield: Should frost 20-24 cupcakes.


The birthday girl loved her cupcakes. She hasn't stopped raving about them.

Nov 22, 2012

Baking time: Thanksgiving pies

On Wednesday, after work I got right on track with making my pies. Now, I was a bit apprehensive. I hadn't bought backup pie crusts, in case my homemade crusts didn't work out. I had asked Jenni how hard it was to make crust, and she told me it would be easy, so I held my breath and went for it.

I got the ingredients ready. I was using this recipe from Ina and you didn't need much, just butter, shortening, flour, sugar, salt and water.

I picked Ina's recipe, cause it was all done in the food processor, and that seemed pretty easy to me. First, you pulse the flour, sugar and salt to mix them all up.

Next add the diced butter and shortening (make sure it's all been chilled).

And pulse til the butter is in "pea sized pieces." Mine looked a little more like a crumbly meal or little pebbles.

Then add the ice water until the dough forms a ball. (This one is almost there.)

Then I dumped it all out and formed it into a big disc, wrapped it in plastic and put it in the fridge to rest.

Then it was time to roll it out. This is where it got complicated, not the actual rolling, but finding a rolling pin. I thought Pop had one, and he thought I had it, but the rolling pin was nowhere to be found. I looked around the kitchen for something to use and a bottle of wine worked perfectly.

Getting the dough into the pan was a bit tricky, but I fixed the few tears that happened. And it looked pretty good, I think.

I made two batches of pie crust, since I was making two pies, an apple and a pumpkin. My crusts baked up all pretty.

The pie crusts were so easy to make. If you haven't tried making your own yet, just go for it. It's so much easier (and yummier) than you think.

Nov 21, 2012

Baking time: Oatmeal Cranberry Cookies

Mom asked me to go traditional this year with a pumpkin and apple pie for Thanksgiving, but I wanted to make something a little different too. And since, we didn't have time for a Thanksgiving lunch at work, I decided to make some cookies to share with my co-workers.

I wanted to make something seasonal, something more than just a chocolate chip cookie, so I decided on Oatmeal Cranberry Cookies. Since this time of year is all about baking from scratch (and let's be serious, it just tastes better that way), I stocked up on butter, flour and sugar and got started.

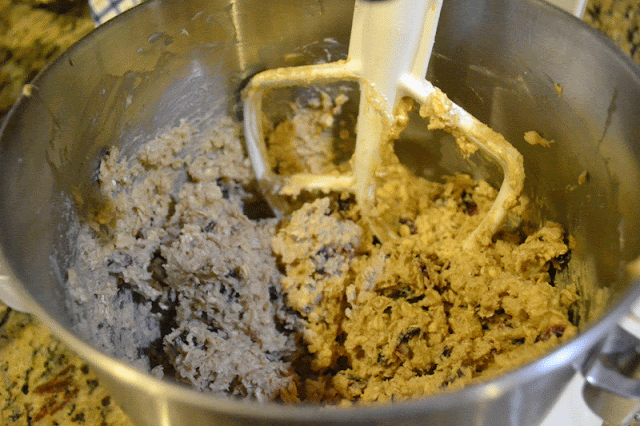
I used this recipe as a starting point. It's a pretty basic cookie recipe, just cream the butter and sugars, add the eggs and vanilla. Then combine the dry ingredients and add it to the butter mixture. Then you stir in the  cranberries and you're ready to bake.

I added some extra salt to my cookies, and also omitted the nutmeg and cardamon. The extra salt gave them just the right touch.

You can make tons of variations with this basic oatmeal cookie recipe. You can go more traditional with raisins, or use any other dried fruit. I think the addition of walnuts would also be yummy and go great with the autumn feel of the oatmeal and cranberries.

This has been just the start of my Thanksgiving baking for this year. Today I will attempt to make pie crust from scratch. Wish me luck!

Aug 22, 2012

Super Easy Peach Cobbler

Mom and I are throwing Abuela a birthday lunch in a few weeks, and we decided to give it a Southern theme. We were planning the menu and wanted something other than cake for dessert.Since Abuela likes peaches, we decided on a peach cobbler. I've been researching recipes online, and combined a few to come up with this super easy cobbler recipe.


Super Easy Peach Cobbler

Ingredients:
1 bag frozen peaches, thawed
2 tablespoons sugar (or more to taste)
1 tablespoon flour
1/4 cup packed brown sugar
1/4 cup old fashioned oats
1/4 cup flour
2 tablespoons butter, cut into small cubes
--Serves 4--

Preheat oven to 350 F.
In a medium bowl, combine the peaches, 2 tablespoons sugar and 1 tablespoon flour. Set aside.

In a separate bowl, combine the brown sugar, oats and flour.


Add the butter and break it up with your fingers to make a coarse, crumbly meal (you can also use a pastry cutter--I don't have one).


Put the peaches in an oven safe dish and top with the crumble mixture.


Bake in the preheated oven for 35-40 minutes until the crumble is browned and the peaches are tender. Make sure the top doesn't burn!

Scoop some out, top with ice cream or whipped cream and enjoy!

I hope you like the cobbler recipe as much as I did. It's a super easy and fast recipe that I'm sure would work great with any kind of fruit. 

Jun 18, 2012

My weekend: beach, parties and Pop

What a great weekend. I think they need to make the summer weekends a little longer. I need time to recuperate from all of the fun.

Saturday was party hopping day for me. First, I had Karina's birthday beach bash. We all headed over to her mom's apartment on Sunny Isles Beach to celebrate in style. We enjoyed our wine slushies, provided by yours truly, and had lunch (I brought a lemon pasta salad--I'll share the recipe below), before getting out onto the beach. We all grabbed our sun hats and headed out.
It was such a bright pretty South Florida afternoon. We really enjoyed the beach and the water, even though the waves kept soaking us.

After enjoying plenty of time in the surf and sand, we headed back to the pool and got ready to cut the cake. Isn't the cake adorable? It was almost to cute to eat... almost.

It was so great to be able to spend the day with Karina and her family and all of my girls. We definitely celebrated in South Florida style.

After I left the beach, I headed home, changed and then went to my Uncle Willy's house for a family Father's Day celebration. All three generations were represented. The elders didn't play loteria, their usual on Saturday nights, but they had a great time talking.

I even made it in time to dig into to the yummy food, a traditional Cuban spread, pork, congris, yuca and platanitos.

Mom may have enjoyed a cocktail or two...while Pop took her picture.

And the girl cousins caught up on all of the gossip.

Here's our own version of see no evil, hear no evil, speak no evil... courtesy of the tios, Uncle Ramon, Uncle Willy and Uncle Arnie.

Of course, the night couldn't end before taking the traditional family picture. It was a great night full of food, fun and family. Of course, there was a blubbering, teary, sentimental speech made, but that's just part of the experience. It was great spending time with everyone.

Sunday for Father's Day, we kept it low key. I spent the day in the kitchen making pasta salad for dinner and some goodies for work the next day. Then Mom, Pop and Angel (Richard was working) came over to have a Father's Day dinner. Pop brought his Father's Day gift a new Kindle Fire. In a few hours he'd already downloaded some games and plenty of other stuff.

Dinner was yummy. Mom made baked pork ribs and I made Lemon Pasta Salad. The pasta salad is super easy, I got it off of this recipe I found on Pinterest. I made a couple of changes, like leaving out the parmesan cheese and using bow tie pasta instead of orzo.

The salad comes together pretty quick once you gather all of the ingredients. And the dressing is so yummy, I might make it to put on regular salads too.

Pop really liked the salad, and so did everyone else. I think this will have to be my go to summer picnic dish from now on. And since there is no mayo (and I hate mayo anyways) there is no need to put this in the fridge. It's yummy at room temp or even chilled.

After our dinner, we had some frozen key lime pie and watched the end of the NASCAR race (my brother Angel is obsessed). It was a great (and yummy) end to the weekend. Happy Father's Day to all the dads, and especially my Pop!